Python exercises for ages 10+
Create a paint app
Part 1
Using the below code as a starting point, create a small square wherever the user drags their mouse.
from tkinter import *

c = Canvas(Tk(), width = 500, height = 500)
c.pack()

def onMouseClicked(event):
    x = event.x
    y = event.y
    print("Mouse clicked at:", x, y)

def onMouseDragged(event):
    x = event.x
    y = event.y
    print("Mouse dragged at:", x, y)

c.bind("<Button-1>", onMouseClicked)
c.bind("<B1-Motion>", onMouseDragged)

mainloop()
Part 2
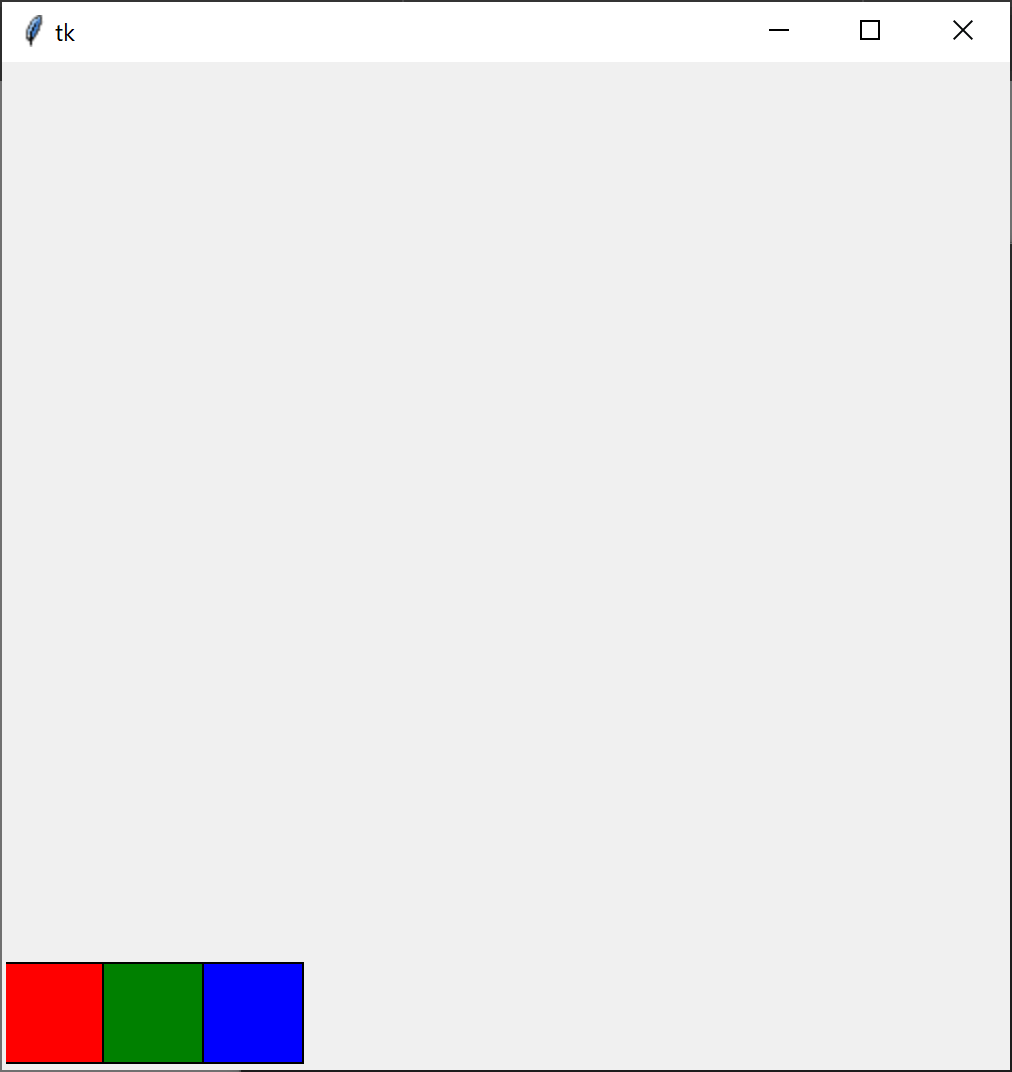
Calculate the coordinates and create three squares in a row (red, green, and blue) at the bottom left corner of the window like in the image below.
Extend the mouse-click callback function to detect if a mouse click is inside the bounds of one of these three squares. If it is, set a global colour variable to the corresponding colour and use it to change the colour of your “brush”. Set the named variable outline to the same colour as fill to avoid black outlines.
Extra

- Extract the colour picking logic into a separate function called
isPointInBoundingBox(pX, pY, bMinX, bMinY, bMaxX, bMaxY)which returnsTrueif the point (pX, pY) is inside the box described by (bMinX, bMinY) and (bMaxX, bMaxY) — the top left and the bottom right corners respectively (see image above). If (pX, pY) is not within these bounds, the function should returnFalse. Use this function to detect clicks in the coloured squares. - Check the Tkinter/Canvas documentation to find out how to set keyboard events. Make the
bkey toggle between square and circular brushes, and make the+and-keys increase and decrease brush size respectively. - Notice how when the mouse moves too quickly, there are gaps in the drawn lines. Create a third brush that uses the Canvas function
create_lineand previously stored coordinates to draw lines instead of shapes. - Make the
ckey clear the canvas (refer to Canvas documentation to find out how to clear the canvas) while keeping the colour picker.